November Earring Giveaway
Wednesday, November 7, 2012
November 07, 2012
Enter here to win your choice of earrings from cloverleaf creations, any design - any color:


Click HERE to go shopping for earrings!
Blog Button
Thursday, October 4, 2012
October 04, 2012
Just made a blog button using a really great tutorial. There is also a "grab box" to go with it on my sidebar. I don't know if I can get it in this post; I know just enough about this stuff to be clumsily dangerous.
I used Apple's Pages and Preview to get a graphic and Gimp to edit the j-peg. I tried a few other tutorials but they were way too involved and complicated-wish I had found this one first! If you make your own, let me know and I'll try to figure out how to start my own "button jar" here.

I used Apple's Pages and Preview to get a graphic and Gimp to edit the j-peg. I tried a few other tutorials but they were way too involved and complicated-wish I had found this one first! If you make your own, let me know and I'll try to figure out how to start my own "button jar" here.
Easy Triple-Wrap Bracelet
Wednesday, September 26, 2012
September 26, 2012

I had some prepared ends lying around and they kind of fell together and I pulled and Voila! this cute little knot happened! I did some making and measuring and came up with the triple wrap "join" bracelet.
Here's how to make your own~
You don't need much to get started:

-Two ribbon crimps, 6-8mm wide.
-Two 3mm jump rings.
-A toggle or lobster clasp, large-ish is better.
1) Choose two colors.
2) Measure your wrist. Cut two lengths of suede lace using these measurements:
-6" wrist:: Cut two 20" pieces.
-6 1/2" wrist:: Cut two 22" pieces.
-7" wrist:: Cut two 24" pieces.

 3) Make sure that each piece is straight and not twisted before you add the crimps. Do this by doubling the piece and laying it on a flat surface.
 4) Hold the ends of one piece together and add a very, very small bit of glue to the tips of the suede. Center the crimp to make sure that the suede ends are not hanging out of either side, then close the crimp. I use jewelry pliers to do this so they don't scratch the crimp. If you're digging these bracelets, you might want to buy a pair because they're specially made not to scratch metal. Repeat for the other length of suede.
5) Lay the pieces out, one over the other lengthwise:

Grab the right (brown) end, pulling it over the blue loop and the left (blue) end, pulling it under the brown loop.

Carefully pull the ends away from the center, making sure the suede doesn't twist.

Pull the ends until your center join is tight.

6) Add your toggle or lobster clasp using the jump rings. To properly open and close jump rings, don't open the circle up. Swing the ends away from each other like a gate; close the same way.
I lay the joint on the top of my wrist and loop each end around, then clasp.

See! Not so hard! Hope you enjoy making these. You have my permission to make as many as you want to sell for fundraisers or give as gifts. Go crazy!
Jewelry-sitting...
Monday, September 24, 2012
September 24, 2012
I know... what the heck is jewelry-sitting? Well, my sweet, little friend Guitta makes lovely, large and colorful jewelry, the exact opposite of what I make. Originally from Lebanon, she returns there for half of every year to visit with her elderly parents. She and I were "neighbors" at The Boulevard in NoDa and then again at The Boulevard at Southend. She just left and now, I'm jewelry-sitting! We jewelry makers have to stick together because it's a very competitive vocation.
Guitta's using a shelf in my space at The Boulevard, but she gave me some extra pieces to restock. So, I brought them home and promptly took everything out and tried it on! She has such a great eye for combining colors and different types of beads. I wanted to share some of her pieces with you~
Guitta's using a shelf in my space at The Boulevard, but she gave me some extra pieces to restock. So, I brought them home and promptly took everything out and tried it on! She has such a great eye for combining colors and different types of beads. I wanted to share some of her pieces with you~
 |
| $ 48, 18 inches |
 |
| $ 20, 18 inches |
 |
| $ 29, 18 inches (My favorite!) |
 |
| Wear long or doubled, $ 32, 32 inches |
 |
| $ 48, 18 inches |
 |
| $ 24, 18 inches (another favorite) |
 |
| $ 25, 18 inches ; matching earrings $ 3 |
 |
| $ 26 each, rectangle pendant is on 20 inch chain and square is on 18 inch chain |
 |
| $ 46, 18 inches |
Earring Giveway!
Sunday, September 23, 2012
September 23, 2012
Giveaways are so much fun! Here's what I'm giving away:
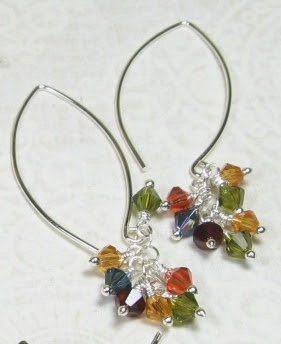 Raffle begins Monday, September 24, 2012 and lasts until Monday, October 1, 2012. I'll post the winner on the cloverleaf creations facebook page. There are lots of opportunities for multiple entries:
a Rafflecopter giveaway
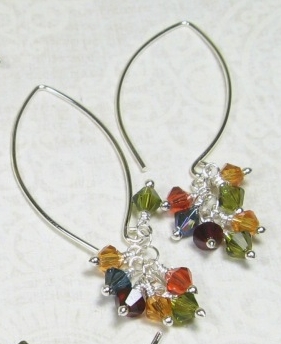
a Rafflecopter giveaway
May the odds be forever in your favor~
I ❤ Poached Eggs
Monday, September 10, 2012
September 10, 2012
One would think that, with an egg being... well, an egg, that it would taste the same, barring any seasoning, no matter which method is used to prepare it. I beg to differ. Poached eggs have a different flavor, a more pure, natural flavor.
The first time I had poached eggs, my step-dad made them. He boiled water in a pot and threw the eggs in. By the time they were done, they were just yolks covered with a thin layer of white, but they still tasted great. Over the years, I've tried to poach eggs using several different methods and usually ended up with watery, scrambled eggs or drippy, runny yolks and I don't do runny yolks. When I began trying to eat healthier, I was determined to learn how to poach eggs properly and, thanks to google, I am a mean, egg-poaching machine. Here's what you do:
First, don't use a pot. Use a skillet (or frying pan for us southerners.) Fill it 3/4 of the way to the rim and heat it on high until it just starts to boil. At this point, turn the heat way down, usually by half, but make sure there are still a few bubbles.
If not, your water will not be hot enough and your egg white will scatter. If you let your water boil too long because in a random ADD moment, you started cleaning the stove, take the skillet off the heat for a bit.
While you're waiting for the water to boil, find a small dish. I found these cute little glass cups at the dollar store; four for $1! Crack the egg into the dish. You'll also need a small spatula.
When the water's at that small bubble boiling point, gently lower the side of the dish into the boiling water. WATCH YOUR FINGERS! Wait for the egg white to settle a bit, then slowly slide the rest of the egg into the water.
Wait about 30 seconds, then delicately slide your spatula under the egg white and loosen it from the bottom.
The egg should float and a large portion of the white should stay together. Set a timer for 10 minutes.
 As I mentioned before, I don't do runny eggs and by runny, I mean any tiny portion of the yolk uncooked. Avoid undercooked yolks by gently flipping the eggs over at the 10 minute mark. Slide your spatula under the egg and use the side of the skillet to cushion the flip. After three minutes, you can flip them back over so the yolk is on top, making a nice presentation because you're prone to OCD or just leave them as is. Hold each egg over the pan for a few seconds to let the water drain off. Add some fruit and ketchup. Yes, ketchup. Enjoy your successful egg endeavor.
The first time I had poached eggs, my step-dad made them. He boiled water in a pot and threw the eggs in. By the time they were done, they were just yolks covered with a thin layer of white, but they still tasted great. Over the years, I've tried to poach eggs using several different methods and usually ended up with watery, scrambled eggs or drippy, runny yolks and I don't do runny yolks. When I began trying to eat healthier, I was determined to learn how to poach eggs properly and, thanks to google, I am a mean, egg-poaching machine. Here's what you do:
 |
| Skillet, not pot. |
 |
| Scattered egg white. |
If not, your water will not be hot enough and your egg white will scatter. If you let your water boil too long because in a random ADD moment, you started cleaning the stove, take the skillet off the heat for a bit.
 |
| Cute, little bowl. |
While you're waiting for the water to boil, find a small dish. I found these cute little glass cups at the dollar store; four for $1! Crack the egg into the dish. You'll also need a small spatula.
 |
| gently, gently... |
When the water's at that small bubble boiling point, gently lower the side of the dish into the boiling water. WATCH YOUR FINGERS! Wait for the egg white to settle a bit, then slowly slide the rest of the egg into the water.
 |
| Loosen the egg from the bottom. |
Wait about 30 seconds, then delicately slide your spatula under the egg white and loosen it from the bottom.
 |
| A nice, oval shape means the water's just right. |
The egg should float and a large portion of the white should stay together. Set a timer for 10 minutes.
 As I mentioned before, I don't do runny eggs and by runny, I mean any tiny portion of the yolk uncooked. Avoid undercooked yolks by gently flipping the eggs over at the 10 minute mark. Slide your spatula under the egg and use the side of the skillet to cushion the flip. After three minutes, you can flip them back over so the yolk is on top, making a nice presentation because you're prone to OCD or just leave them as is. Hold each egg over the pan for a few seconds to let the water drain off. Add some fruit and ketchup. Yes, ketchup. Enjoy your successful egg endeavor.
The Difference Between a Cobbler & a Crisp
Thursday, September 6, 2012
September 06, 2012
This past July, my awesome husband decided to find a local peach farm. He was very tired of the grocery store peaches that tasted like fibrous cardboard, even during peach season. We live in Charlotte, NC about 45 minutes away from SC, one of the biggest peach producing states in the country and our Costco sells peaches from NJ. [blank stare]
We found a cute little peach stand just over the border into SC, Springs Farm. Great directions are on the website. I must say that these peaches were some of the best I've ever tasted and we will be making this an annual family outing from now on! We even took some to Chicago when visiting family, just to share our Carolina 'sunshine'.
So, all these peaches and what to do with them? My entire family would have been fine with eating a peach every other hour or so, but we wanted to preserve some of that joy for the coming months. So, I made peach jam~ Recipe will follow in a future post. You will definitely want to check back because it's *amazing*

We also wanted to try some in a Peach Cobbler so I googled 'Peach Cobbler'. I was just a little confused because, growing up, my grandmothers made cobbler all the time and I knew exactly the kind of recipe I was looking for. My favorite part of the cobbler wasn't the fruit so much as the moist, mushy dough covered with fruit goo inside the cobbler and the golden, flaky crust on top. This was what I imagined when I began my recipe search. Most of the results that came back were for what I call a crisp: no dough, just a mix of flour and butter, crisped on top of the baked fruit. (By the way, I have a recipe for an apple crisp that is also *amazing* and will post later as well!)
And the sugar content-WOW! Our peaches were already naturally sweet and I wanted to preserve that taste, not add 3 cups of sugar to the mix. So I basically used biscuit dough to capture my idea of the Perfect Cobbler and it worked! Here's my dough recipe. I used white wheat flour instead of regular flour and mixed honey in with the peaches instead of sugar. Don't forget to add little drops of dough into the peach mix before you put the top crust on!
We found a cute little peach stand just over the border into SC, Springs Farm. Great directions are on the website. I must say that these peaches were some of the best I've ever tasted and we will be making this an annual family outing from now on! We even took some to Chicago when visiting family, just to share our Carolina 'sunshine'.
So, all these peaches and what to do with them? My entire family would have been fine with eating a peach every other hour or so, but we wanted to preserve some of that joy for the coming months. So, I made peach jam~ Recipe will follow in a future post. You will definitely want to check back because it's *amazing*

We also wanted to try some in a Peach Cobbler so I googled 'Peach Cobbler'. I was just a little confused because, growing up, my grandmothers made cobbler all the time and I knew exactly the kind of recipe I was looking for. My favorite part of the cobbler wasn't the fruit so much as the moist, mushy dough covered with fruit goo inside the cobbler and the golden, flaky crust on top. This was what I imagined when I began my recipe search. Most of the results that came back were for what I call a crisp: no dough, just a mix of flour and butter, crisped on top of the baked fruit. (By the way, I have a recipe for an apple crisp that is also *amazing* and will post later as well!)
And the sugar content-WOW! Our peaches were already naturally sweet and I wanted to preserve that taste, not add 3 cups of sugar to the mix. So I basically used biscuit dough to capture my idea of the Perfect Cobbler and it worked! Here's my dough recipe. I used white wheat flour instead of regular flour and mixed honey in with the peaches instead of sugar. Don't forget to add little drops of dough into the peach mix before you put the top crust on!


