Showing posts with label recipes. Show all posts
Showing posts with label recipes. Show all posts
Oven Omelettes
Wednesday, March 6, 2013
March 06, 2013
 Every Friday night is breakfast night at our house. My family of three guys really look forward to it now that it's an established routine. I would enjoy it too, if I didn't have to become a short-order cook every time we have anything with eggs. We're part of an egg co-op and get a LOT of eggs so most Breakfast Nights, we have eggs. Ergo, most Friday nights, I am a short-order cook.
One week, my kids asked for omelettes and I said yes, as I inwardly groaned. As I was preparing to stand over a hot pan for the next 30 minutes, I had an idea: why not bake them in the oven. Of course, there are expectations for the appearance of omelettes so dragging out my trusty parchment paper, I 'crafted' a method to make semi-circles just as if I was working at a diner.


You should have a high ridge through the middle of your pan. This acts as a separator for your eggs, also creating a lovely semi-circle shaped omelette.
I actually pour the egg mixture into each side, then add each person's preferred ingredients, gently mixing them. Figure out what works best for you but I figure the less dishes to clean, the better!


I bake all four omelettes at once, with everyone's order and I don't have to slave over a large frying pan. I guess there's also something to be said about the lower calories and all, but that just means I can add more cheese to mine.


A Smoothie for You
Saturday, February 23, 2013
February 23, 2013
We've started making smoothies in our house. Well, my husband started making them. And when my husband makes food he doesn't worry about superfluous things like flavor or texture. It's all about nutritional value and using up whatever's in the fridge. Since this was my kids first experience with smoothies, they weren't very excited. Neither was I...
Until I started buying frozen fruit at Costco! I've been trying to get rid of processed food in our house and had heard that frozen was better than canned. I made a frozen pineapple smoothie and WOW! did it taste good! So now, my boys and I are not afraid of smoothies anymore. I actually made one for breakfast today and, since the (super-picky) 12-year-old approved, I thought that you might also.
Here it is:
 Pineapple Cherry Smoothie
About 15 1" pieces of frozen pineapple
About 15 frozen cherries
1 smallish banana
1/2 cup almond milk
1-2 tablespoons flax meal
Throw it all in a blender and smoothie it up.
CAVEAT: Don't drink this too fast. Brainfreeze!

Until I started buying frozen fruit at Costco! I've been trying to get rid of processed food in our house and had heard that frozen was better than canned. I made a frozen pineapple smoothie and WOW! did it taste good! So now, my boys and I are not afraid of smoothies anymore. I actually made one for breakfast today and, since the (super-picky) 12-year-old approved, I thought that you might also.
Here it is:
 Pineapple Cherry Smoothie
About 15 1" pieces of frozen pineapple
About 15 frozen cherries
1 smallish banana
1/2 cup almond milk
1-2 tablespoons flax meal
Throw it all in a blender and smoothie it up.
CAVEAT: Don't drink this too fast. Brainfreeze!
The Invention of the Century
Friday, February 15, 2013
February 15, 2013
You're gonna laugh when you find out what it is, you really are...
 Today, I did not eat breakfast. When my husband came home around noon, he grabbed a bag of tortilla chips and salsa. I wanted some, but I hadn't eaten breakfast yet. If you're one of those lucky people blessed/cursed with OCD, you'll understand. I needed to have breakfast food before I could eat snack food. So, I thought I would scramble some eggs real fast, then have some chips and salsa.
 Microwave Nachos are one of my favorite snacks. My kids love them too. Hey, they're better than a jelly doughnut, right? My brain put this together with breakfast and ~voila~ Scrambled Egg Nachos!
My 12 year-old son walked in while I was making them (which took all of 6 minutes) and called them The Invention of the Century.
I scrambled two eggs, threw some chips on a plate, grated the cheese, microwaved it all for a minute and had tasty nachos that lasted all of 20 seconds between myself and the 12-year-old.


 Microwave Nachos are one of my favorite snacks. My kids love them too. Hey, they're better than a jelly doughnut, right? My brain put this together with breakfast and ~voila~ Scrambled Egg Nachos!
My 12 year-old son walked in while I was making them (which took all of 6 minutes) and called them The Invention of the Century.
I scrambled two eggs, threw some chips on a plate, grated the cheese, microwaved it all for a minute and had tasty nachos that lasted all of 20 seconds between myself and the 12-year-old.

S'mores Bars
Saturday, February 9, 2013
February 09, 2013
 So today, oddly enough, my 16-year-old son dragged himself out of digital-land long enough to create these extremely tasty s'mores bars. We had a bonfire one night and had tons of stuff left over so he was playing around with it, making a dip, etc. The bars were the end result of his experimentation and I'm writing a blog post about them to keep myself from sneaking back into the kitchen to have another one. I did sneak a small bite as I took the picture, but don't tell anyone...
S'mores Bars
6 regular-sized Hershey's Milk Chocolate Bars
(I'm assuming you know exactly what size I'm referring to)
8 large marshmallows
1/2 cup of milk
12-14 graham carckers, broken in to 1/2" pieces.
 Using a double boiler, melt the chocolate bars and marshmallows, stirring continuously (very important.) These kind of things take special attention otherwise you end up with a dried up fresco painting. After everything is nice and gooey, add the milk and let it all mix together. I kind of zipped in and out of the kitchen during this part and he was being very attentive! I also helped him break the graham crackers up into pieces. I try not to hover, but that was just too much for my OCD to handle. I'll let you manage yours on your own...BUT be sure not to get them too big, and try not to squeeze them so that all you have is fine dust instead of small cracker bits and you really do have to break them by hand, no putting them in a zip-loc and smashing them. Ok, now I'll let you manage it on your own...
Spread butter over the bottom and sides of a pan, not too big of a pan because this doesn't make a huge amount.
I left the house at this point to deliver the other child to an activity. I came home and opened the fridge and there they were...waiting. They taste exactly like s'mores minus the charred marshmallow (which I love btw.) So I would say this recipe would make about 8-10 medium sized bars. I really don't know because, during this past hour, we've all been sneaking into the fridge and cutting off bite-sized pieces and acting like we were just looking for something...

Sausage Breakfast Pizza
Friday, February 1, 2013
February 01, 2013
WOW! Is this good! Just made it tonight and plan on making for every overnight guest we have for the next 10 years...
 Click the photo to visit the magazine that delivered this goodness to us! However, just in case, I've included the recipe below.
It's super easy, but I would encourage you to read the entire recipe before you start. I didn't do everything exactly right and though it turned out awesome, a read-through would have saved me some time. ENJOY!
SAUSAGE & EGG BREAKFAST PIZZA
Ingredients:

It's super easy, but I would encourage you to read the entire recipe before you start. I didn't do everything exactly right and though it turned out awesome, a read-through would have saved me some time. ENJOY!
SAUSAGE & EGG BREAKFAST PIZZA
Ingredients:
- 2 packages (8 ounces each) refrigerated crescent rolls
- 1 pound bulk pork sausage
- ⅓ cup chopped onion
- 1 small green pepper, chopped
- 1 envelope country gravy mix
- 6 eggs
- 2 tablespoons milk
- ½ teaspoon salt
- ¼ teaspoon pepper
- 1 tablespoon butter
- 1¼ cups sliced fresh mushrooms
- 2 cups (8 ounces) shredded cheddar cheese
- 1 cup (4 ounces) shredded pepper jack cheese
- Separate crescent dough into 16 triangles and place on a greased 14-inch round pizza pan with points toward the center. Press onto the bottom and up the sides of pan to form a crust; seal seams. Bake at 375 degrees for 11–13 minutes or until golden brown.
- Meanwhile, in a large skillet, cook the sausage, onion and green pepper over medium heat until sausage is no longer pink; drain. Prepare gravy according to package directions. Stir into sausage mixture; set aside.
- In a small bowl, whisk the eggs, milk, salt and pepper. In a large skillet, heat butter over medium heat. Add egg mixture; cook and stir until almost set. Spread gravy mixture over crust. Top with eggs, mushrooms and cheeses. Bake 5–10 minutes longer or until eggs are set and cheese is melted. Cut into wedges.
I ❤ Poached Eggs
Monday, September 10, 2012
September 10, 2012
One would think that, with an egg being... well, an egg, that it would taste the same, barring any seasoning, no matter which method is used to prepare it. I beg to differ. Poached eggs have a different flavor, a more pure, natural flavor.
The first time I had poached eggs, my step-dad made them. He boiled water in a pot and threw the eggs in. By the time they were done, they were just yolks covered with a thin layer of white, but they still tasted great. Over the years, I've tried to poach eggs using several different methods and usually ended up with watery, scrambled eggs or drippy, runny yolks and I don't do runny yolks. When I began trying to eat healthier, I was determined to learn how to poach eggs properly and, thanks to google, I am a mean, egg-poaching machine. Here's what you do:
First, don't use a pot. Use a skillet (or frying pan for us southerners.) Fill it 3/4 of the way to the rim and heat it on high until it just starts to boil. At this point, turn the heat way down, usually by half, but make sure there are still a few bubbles.
If not, your water will not be hot enough and your egg white will scatter. If you let your water boil too long because in a random ADD moment, you started cleaning the stove, take the skillet off the heat for a bit.
While you're waiting for the water to boil, find a small dish. I found these cute little glass cups at the dollar store; four for $1! Crack the egg into the dish. You'll also need a small spatula.
When the water's at that small bubble boiling point, gently lower the side of the dish into the boiling water. WATCH YOUR FINGERS! Wait for the egg white to settle a bit, then slowly slide the rest of the egg into the water.
Wait about 30 seconds, then delicately slide your spatula under the egg white and loosen it from the bottom.
The egg should float and a large portion of the white should stay together. Set a timer for 10 minutes.
 As I mentioned before, I don't do runny eggs and by runny, I mean any tiny portion of the yolk uncooked. Avoid undercooked yolks by gently flipping the eggs over at the 10 minute mark. Slide your spatula under the egg and use the side of the skillet to cushion the flip. After three minutes, you can flip them back over so the yolk is on top, making a nice presentation because you're prone to OCD or just leave them as is. Hold each egg over the pan for a few seconds to let the water drain off. Add some fruit and ketchup. Yes, ketchup. Enjoy your successful egg endeavor.
The first time I had poached eggs, my step-dad made them. He boiled water in a pot and threw the eggs in. By the time they were done, they were just yolks covered with a thin layer of white, but they still tasted great. Over the years, I've tried to poach eggs using several different methods and usually ended up with watery, scrambled eggs or drippy, runny yolks and I don't do runny yolks. When I began trying to eat healthier, I was determined to learn how to poach eggs properly and, thanks to google, I am a mean, egg-poaching machine. Here's what you do:
 |
| Skillet, not pot. |
 |
| Scattered egg white. |
If not, your water will not be hot enough and your egg white will scatter. If you let your water boil too long because in a random ADD moment, you started cleaning the stove, take the skillet off the heat for a bit.
 |
| Cute, little bowl. |
While you're waiting for the water to boil, find a small dish. I found these cute little glass cups at the dollar store; four for $1! Crack the egg into the dish. You'll also need a small spatula.
 |
| gently, gently... |
When the water's at that small bubble boiling point, gently lower the side of the dish into the boiling water. WATCH YOUR FINGERS! Wait for the egg white to settle a bit, then slowly slide the rest of the egg into the water.
 |
| Loosen the egg from the bottom. |
Wait about 30 seconds, then delicately slide your spatula under the egg white and loosen it from the bottom.
 |
| A nice, oval shape means the water's just right. |
The egg should float and a large portion of the white should stay together. Set a timer for 10 minutes.
 As I mentioned before, I don't do runny eggs and by runny, I mean any tiny portion of the yolk uncooked. Avoid undercooked yolks by gently flipping the eggs over at the 10 minute mark. Slide your spatula under the egg and use the side of the skillet to cushion the flip. After three minutes, you can flip them back over so the yolk is on top, making a nice presentation because you're prone to OCD or just leave them as is. Hold each egg over the pan for a few seconds to let the water drain off. Add some fruit and ketchup. Yes, ketchup. Enjoy your successful egg endeavor.
The Difference Between a Cobbler & a Crisp
Thursday, September 6, 2012
September 06, 2012
This past July, my awesome husband decided to find a local peach farm. He was very tired of the grocery store peaches that tasted like fibrous cardboard, even during peach season. We live in Charlotte, NC about 45 minutes away from SC, one of the biggest peach producing states in the country and our Costco sells peaches from NJ. [blank stare]
We found a cute little peach stand just over the border into SC, Springs Farm. Great directions are on the website. I must say that these peaches were some of the best I've ever tasted and we will be making this an annual family outing from now on! We even took some to Chicago when visiting family, just to share our Carolina 'sunshine'.
So, all these peaches and what to do with them? My entire family would have been fine with eating a peach every other hour or so, but we wanted to preserve some of that joy for the coming months. So, I made peach jam~ Recipe will follow in a future post. You will definitely want to check back because it's *amazing*

We also wanted to try some in a Peach Cobbler so I googled 'Peach Cobbler'. I was just a little confused because, growing up, my grandmothers made cobbler all the time and I knew exactly the kind of recipe I was looking for. My favorite part of the cobbler wasn't the fruit so much as the moist, mushy dough covered with fruit goo inside the cobbler and the golden, flaky crust on top. This was what I imagined when I began my recipe search. Most of the results that came back were for what I call a crisp: no dough, just a mix of flour and butter, crisped on top of the baked fruit. (By the way, I have a recipe for an apple crisp that is also *amazing* and will post later as well!)
And the sugar content-WOW! Our peaches were already naturally sweet and I wanted to preserve that taste, not add 3 cups of sugar to the mix. So I basically used biscuit dough to capture my idea of the Perfect Cobbler and it worked! Here's my dough recipe. I used white wheat flour instead of regular flour and mixed honey in with the peaches instead of sugar. Don't forget to add little drops of dough into the peach mix before you put the top crust on!
We found a cute little peach stand just over the border into SC, Springs Farm. Great directions are on the website. I must say that these peaches were some of the best I've ever tasted and we will be making this an annual family outing from now on! We even took some to Chicago when visiting family, just to share our Carolina 'sunshine'.
So, all these peaches and what to do with them? My entire family would have been fine with eating a peach every other hour or so, but we wanted to preserve some of that joy for the coming months. So, I made peach jam~ Recipe will follow in a future post. You will definitely want to check back because it's *amazing*

We also wanted to try some in a Peach Cobbler so I googled 'Peach Cobbler'. I was just a little confused because, growing up, my grandmothers made cobbler all the time and I knew exactly the kind of recipe I was looking for. My favorite part of the cobbler wasn't the fruit so much as the moist, mushy dough covered with fruit goo inside the cobbler and the golden, flaky crust on top. This was what I imagined when I began my recipe search. Most of the results that came back were for what I call a crisp: no dough, just a mix of flour and butter, crisped on top of the baked fruit. (By the way, I have a recipe for an apple crisp that is also *amazing* and will post later as well!)
And the sugar content-WOW! Our peaches were already naturally sweet and I wanted to preserve that taste, not add 3 cups of sugar to the mix. So I basically used biscuit dough to capture my idea of the Perfect Cobbler and it worked! Here's my dough recipe. I used white wheat flour instead of regular flour and mixed honey in with the peaches instead of sugar. Don't forget to add little drops of dough into the peach mix before you put the top crust on!
~Here's to Peach Season 2013~
PIZZA NIGHT Pizza for lunch~
Thursday, September 6, 2012
September 06, 2012
In my first PIZZA NIGHT Pizza post, I proved to myself and the world that making your own pizza on a regular basis is easy, inexpensive and much, much better than serving store-bought pizzas to your family. My children (boys: 16 & 11), however, beg to differ and asked on a regular basis when we were going to start buying frozen pizzas again because they missed the easy lunch option. So instead of lamenting the lack of appreciation for my 'back to basics' efforts, I came up with a way to have homemade pizzas available to my kids for their hobbit-like need to eat several meals a day.
 First you have to make the dough (click on link in first sentence). I've started making a double batch of dough on PIZZA NIGHT since all of the ingredients are already out, the oven's already toasty, etc. Instead of dividing the dough in half as you would for the regular pizzas, divide it into four little balls. Roll these out to only 10" circles. Why 10"? Well, that's the size of the gallon zip-lock freezer bags that you'll need to freeze your lunch-size pizzas!
You can keep the dough in the fridge until the next day or, while you're in pizza making mode~carry on! Bake these 10" dough circles for about 5-6 minutes. I turn the oven down to 350° to make these. I know it's not exactly the right temp after having baked pizzas at 450° but I don't want them to be overdone. Don't let them bake past 6 minutes; they'll turn out too crusty.
 While these are baking, you can prepare four zip-lock bags by writing the directions on the zip-lock bag: Bake @ 400° for 12 minutes.
Once the crusts are done, let them cool down, then add your sauce, cheese and toppings. Carefully, and I do mean carefully, fit each pizza into the aforementioned zip-lock freezer bag. The pizzas should hold up well enough until you get them into the freezer. I was even able to stack mine!
 And the best news: My boys were extremely excited to again have frozen pizzas and I'm happy that I didn't give in and stock up on Totino's.

You can keep the dough in the fridge until the next day or, while you're in pizza making mode~carry on! Bake these 10" dough circles for about 5-6 minutes. I turn the oven down to 350° to make these. I know it's not exactly the right temp after having baked pizzas at 450° but I don't want them to be overdone. Don't let them bake past 6 minutes; they'll turn out too crusty.

Once the crusts are done, let them cool down, then add your sauce, cheese and toppings. Carefully, and I do mean carefully, fit each pizza into the aforementioned zip-lock freezer bag. The pizzas should hold up well enough until you get them into the freezer. I was even able to stack mine!

Make Your Own Mixes
Tuesday, July 24, 2012
July 24, 2012
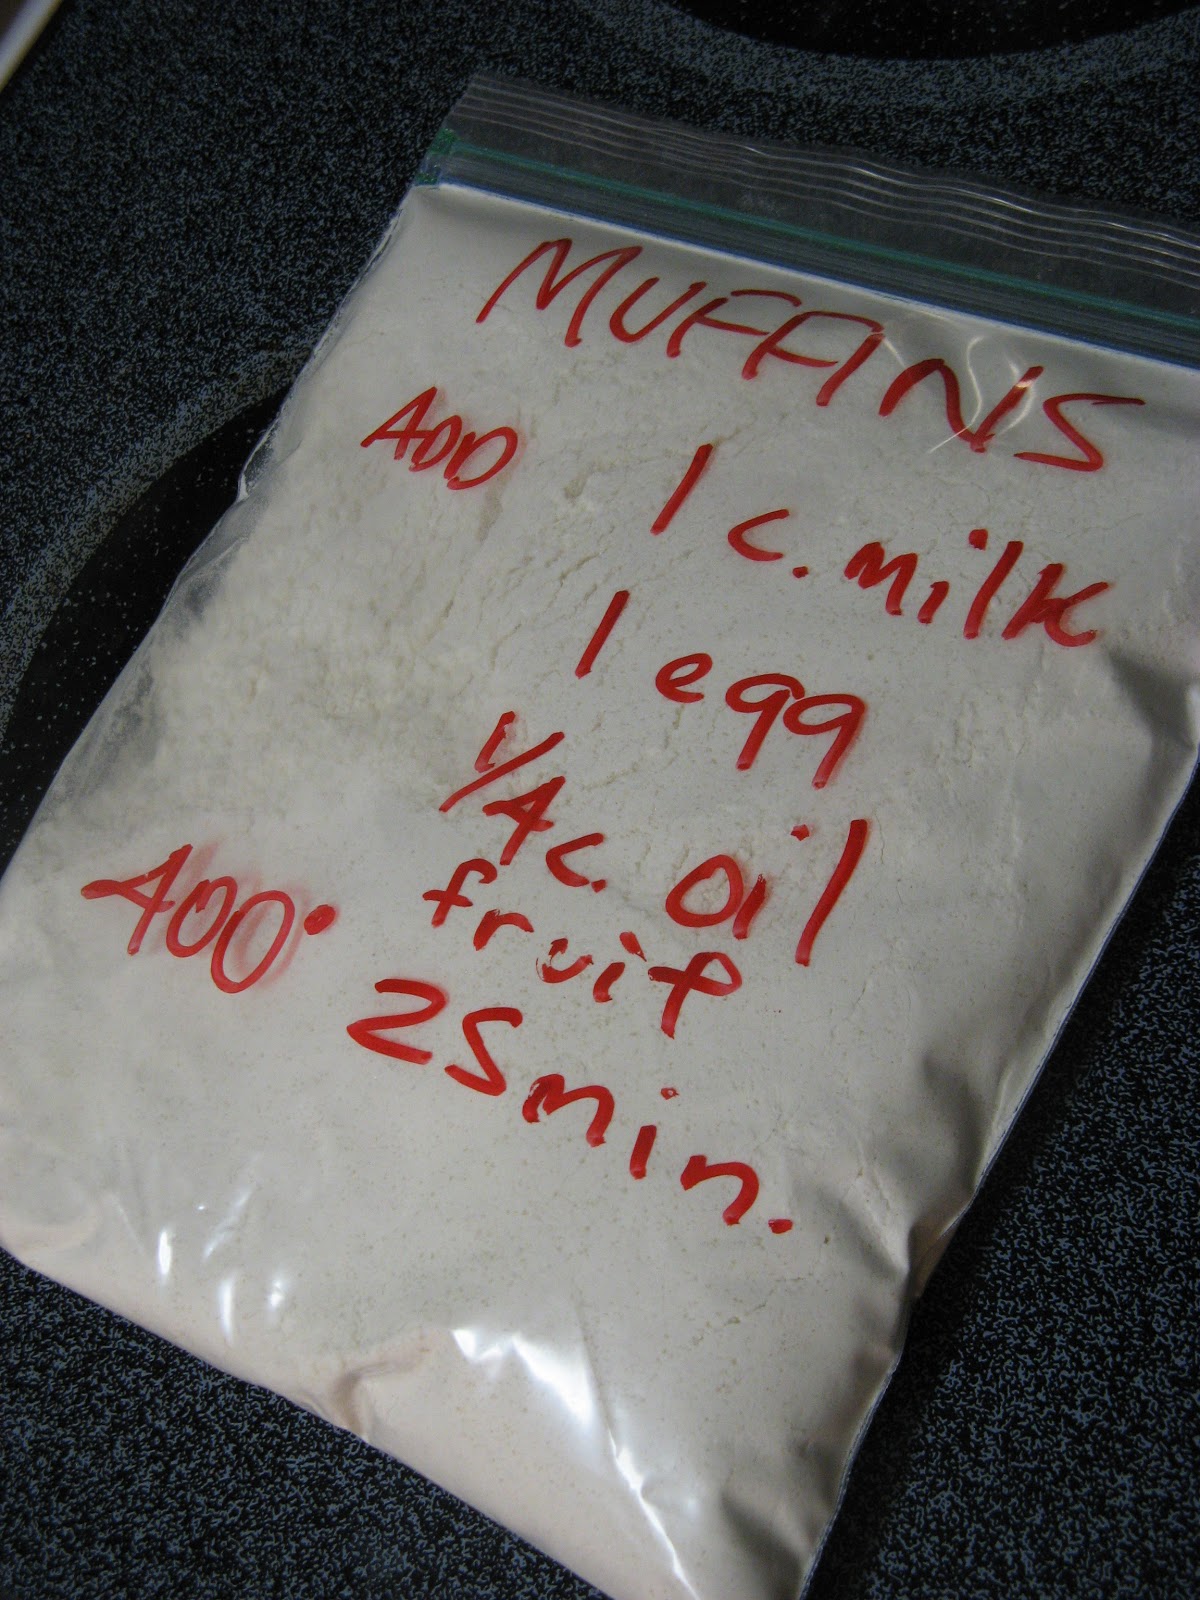 |
| Add some fruit right before you bake your muffins |
BUT STOP!
Guess what I found? Someone has already done all of the work for me! I just found Fake It Frugal, lots of DIY mixes and cleaning products, very excited!Some experiential advice: In my process of switching over to clean eating, I always use the exact ingredients listed and follow the directions given in any new recipe. This way I'm able to figure out where I can make changes that work (use less sugar) AND avoid those that don't (use at least some sugar).
Take my muffin mix for example: I've learned that if you only use baking powder in your recipes, your baked goods have a slight bitter flavor. I began wondering if that's why sometimes baking recipes have both baking powder and baking soda. So, I substituted 1/2 teaspoon of baking soda for one of the teaspoons of baking powder and, BINGO, no bitterness!
You also have to try the chocolate chocolate chip muffins~
PIZZA NIGHT! Pizza Recipe
Saturday, July 21, 2012
July 21, 2012
As promised to several friends, my PIZZA NIGHT pizza process:
First of all, you may be asking 'why?', when there are perfectly good frozen pizzas that you just pop in the oven or awesome papas who will bring a steaming, cheesy pie to your front door, would you want to make your own. Over the past several months, I've decided (due to health reasons and because all my friends are doing it) to clean up what we eat, consuming as few processed foods as possible. I started with a just few of our meals and PIZZA NIGHT pizza was one of them.
Here are the main ingredients that you need for the dough and sauce:
 yeast, flour (I use TJ's white wheat), olive oil, Parmesan cheese, tomato sauce and tomato paste. You'll also need a little bit of sugar, salt, oregano and basil. I found this dough recipe through a random internet search several years ago. It's called Steve's Pizza Dough (link at bottom). I don't know who Steve is, but I salute you, man!
 Dissolve a tablespoon (or one packet) of yeast in 1-1/3 cups water. The water should be at about 120 degrees F. I let my faucet run for a few seconds (I know, wasting water) and it's right at 120. I know this because I actually used a thermometer on it! If the water is too hot, you'll kill the yeast. I don't know if I've ever killed yeast or not, but, hey, it's just pizza dough...
The yeast needs to dissolve in the water, usually takes 5-10 minutes.
While the yeast is doing its thing, combine three cups of flour, 1/2 teaspoon salt, 1/2 teaspoon sugar and 1/4 cup Parmesan cheese in a bowl or your handy-dandy Kitchen Aid mixer. Mix this, then add 2 tablespoons of olive oil. Check your yeast to make sure it's completely dissolved. I usually stir it a little about now. I don't know if that's proper yeast procedure, but I'm impatient.
Turn your mixer on or start stirring and slowly add the dissolved yeast. Mix this until everything sticks together and no flour is left in the bowl. When that's done, I use a silicone scraper to remove all the dough from the paddle and change to the dough hook. I've discovered that silicone scrapers do NOT stick to the dough and make dealing with it a lot easier.


 In order to keep some moisture near the dough, I wet a cloth dish towel (remember, the oven is OFF!) and lay it over the top rack and put the bowl of dough on the bottom rack. Shut the door, set the timer for an hour, 30 minutes if you're short on time, and get ready to make some sauce.


Once you're ready to assemble your pizza, preheat the oven to 450 degrees and spread the sauce to within one inch of the edge, creating your crust. If you want a crust that sticks up above the toppings like the restaurant pizzas, smush the dough up. That's all I've got...


First of all, you may be asking 'why?', when there are perfectly good frozen pizzas that you just pop in the oven or awesome papas who will bring a steaming, cheesy pie to your front door, would you want to make your own. Over the past several months, I've decided (due to health reasons and because all my friends are doing it) to clean up what we eat, consuming as few processed foods as possible. I started with a just few of our meals and PIZZA NIGHT pizza was one of them.
Here are the main ingredients that you need for the dough and sauce:

 Dissolve a tablespoon (or one packet) of yeast in 1-1/3 cups water. The water should be at about 120 degrees F. I let my faucet run for a few seconds (I know, wasting water) and it's right at 120. I know this because I actually used a thermometer on it! If the water is too hot, you'll kill the yeast. I don't know if I've ever killed yeast or not, but, hey, it's just pizza dough...
The yeast needs to dissolve in the water, usually takes 5-10 minutes.
While the yeast is doing its thing, combine three cups of flour, 1/2 teaspoon salt, 1/2 teaspoon sugar and 1/4 cup Parmesan cheese in a bowl or your handy-dandy Kitchen Aid mixer. Mix this, then add 2 tablespoons of olive oil. Check your yeast to make sure it's completely dissolved. I usually stir it a little about now. I don't know if that's proper yeast procedure, but I'm impatient.
Turn your mixer on or start stirring and slowly add the dissolved yeast. Mix this until everything sticks together and no flour is left in the bowl. When that's done, I use a silicone scraper to remove all the dough from the paddle and change to the dough hook. I've discovered that silicone scrapers do NOT stick to the dough and make dealing with it a lot easier.


Before you begin kneading, turn the oven on to warm and PAY ATTENTION TO IT! It only needs to warm up for four-five minutes, then turn it off.
If you don't have a mixer, you get the pleasure of hand-kneading! Do this on a floured surface, like a large cutting board or your dining table if you have negligible amounts of counter space like me. This is a very carthartic process so don't fret. Basically, you're going to smush the dough up into a ball, turn it, then smush it flat, repeat. Knead for about 5-8 minutes. Roll the dough into a ball. Prepare an oven safe bowl or vessel of your choice by coating it with olive oil. Roll the dough around in the oil before you let it settle in it's little oily bed.
 In order to keep some moisture near the dough, I wet a cloth dish towel (remember, the oven is OFF!) and lay it over the top rack and put the bowl of dough on the bottom rack. Shut the door, set the timer for an hour, 30 minutes if you're short on time, and get ready to make some sauce.
For the sauce, I use a 15-ounce can of tomato sauce and a 6-ounce can of tomato paste. Mix these together by putting the paste in a bowl and slowly adding the sauce as you whisk. Then add one teaspoon of basil and one teaspoon of oregano. Sometimes, I add a bit of garlic, but most of the time I forget.
At this time, I double check all of my toppings so that I still have time to run to the store if my 11 year old has eaten all of the pepperoni left from last time.
Some of our favorite toppings are pepperoni (always have this...boys, you know), veggies (whatever I have), fresh basil with black olives and feta or ricotta, and BBQ chicken. Pretty much anything is good on a pizza and it's fun to be creative!
I also use this time to prep my pizza stones. I use the Pampered Chef stones, which are one of the greatest kitchen tools ever and just smear olive oil all over 'em.
If the dough rising fairies have been kind to you, your dough has doubled in size. Smush this down with the super-duper non-sticking silicon spatula and divide it into two halves.

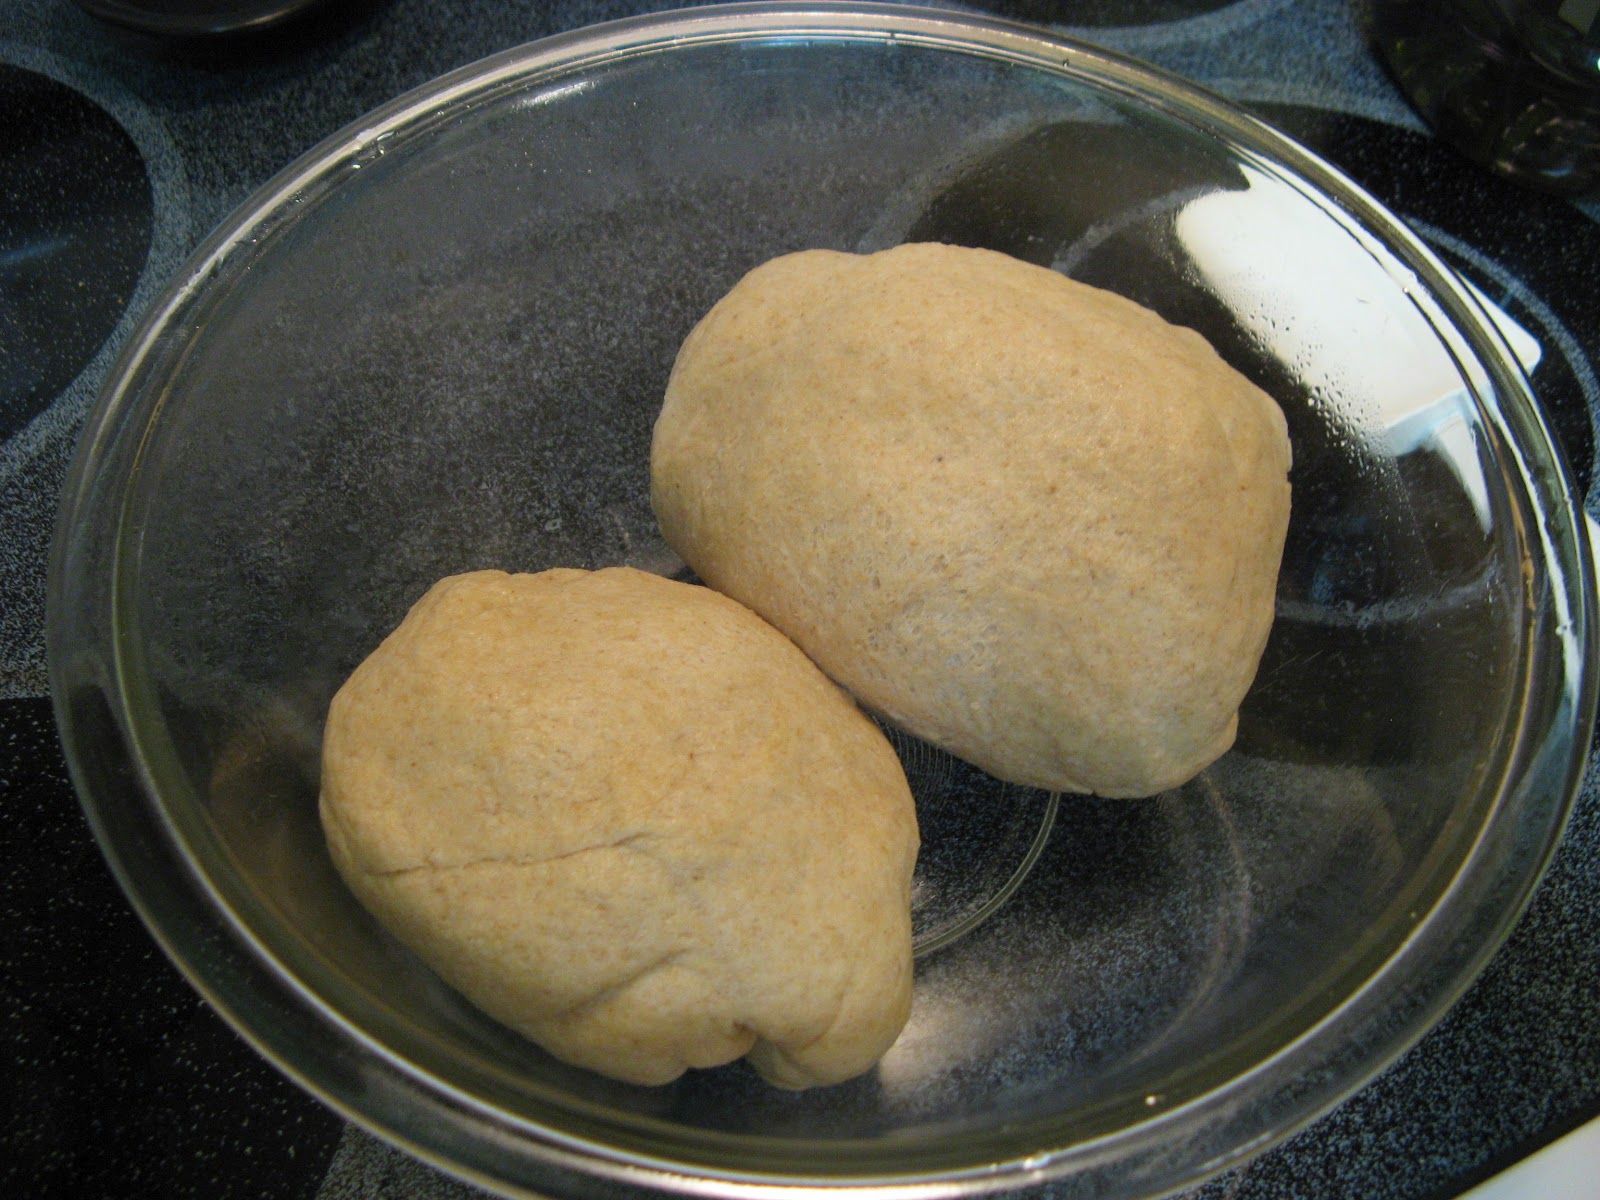
Form them into thick circles and plop them onto the oily stones. Roll the dough all the way out to the edges of the stones and use a fork to poke holes all over the dough.


If you want a thicker crust you can either use the dough to make only one pizza or, once the dough is rolled out onto the stones, warm the oven again and put them back in for another 30 minutes or so.
Once you're ready to assemble your pizza, preheat the oven to 450 degrees and spread the sauce to within one inch of the edge, creating your crust. If you want a crust that sticks up above the toppings like the restaurant pizzas, smush the dough up. That's all I've got...

All that's left is to add your toppings and cheese. Bake the pizzas for 10 minutes or so and that's it!
In my previous experience with homemade pizza, it always seemed to be as expensive as ordering pizza. Thanks to Costco and Trader Joe's, these pizzas aren't that expensive unless you want fancy toppings...
The cost of one pepperoni pizza, not including salt, sugar, basil and
oregano is only $ 4.50. I count the labor as a gift to my family.


